Dynamic DNS with freedns
This tutorial will show you how to configure your frii.site domain to support DDNS with freends.afraid.org.
1. Create an account on https://freedns.afraid.org
Diret link: https://freedns.afraid.org/signup/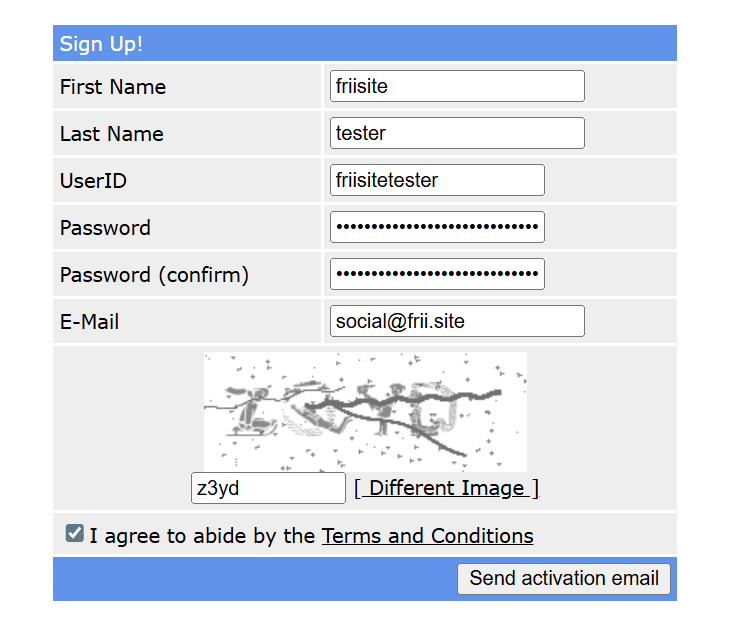 NOTE: Please use your own email address.
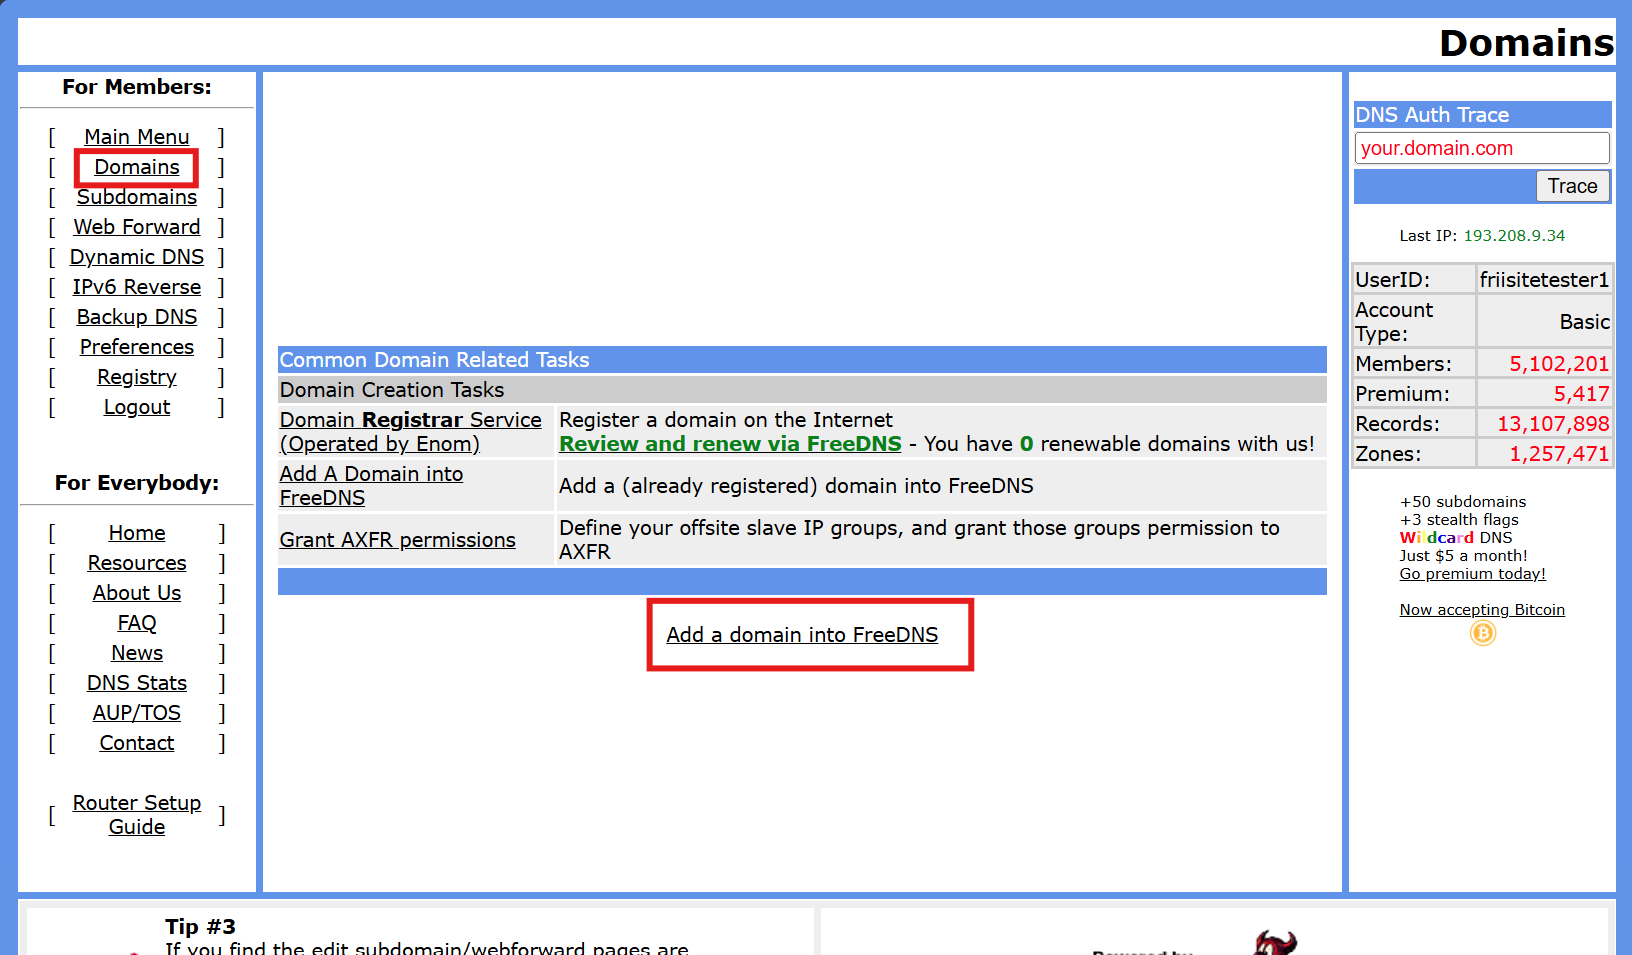
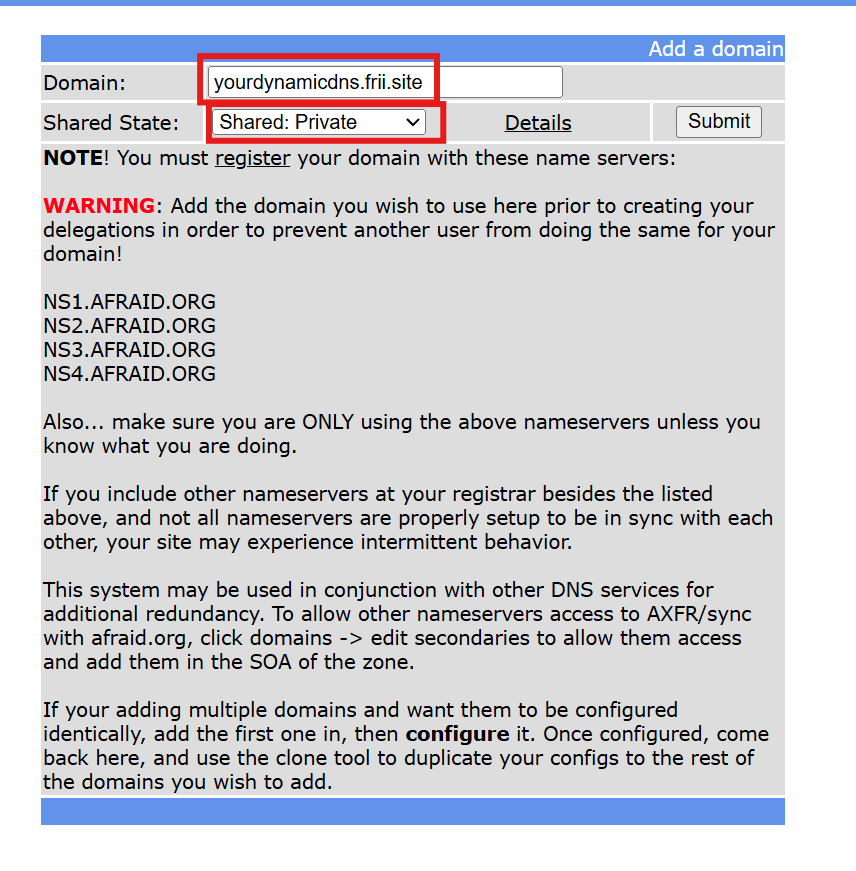
2. Add your domain to freedns
- For the
Domainfield, use what ever domain you want to. In this guide, we will be using "yourdynamicdns.frii.site" - It is very important that you set the
Shared StatetoShared: Private.
3. Link your domain over on frii.site
When you clicked "submit" on the last part, you might have seen a warning about a broken domain. That's what we'll fix next. 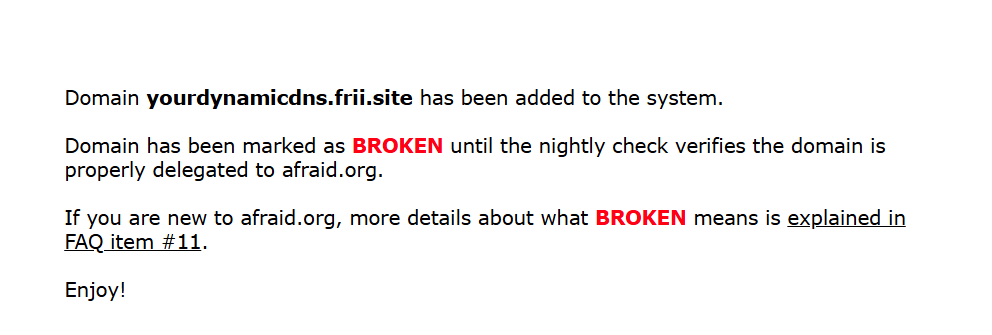
3.0. Create a domain on frii.site if you haven't already
3.1. Change the type to be NS and the content to be ns1.afraid.org
 Click save to save the changes
3.2. Verifying the record on freedns
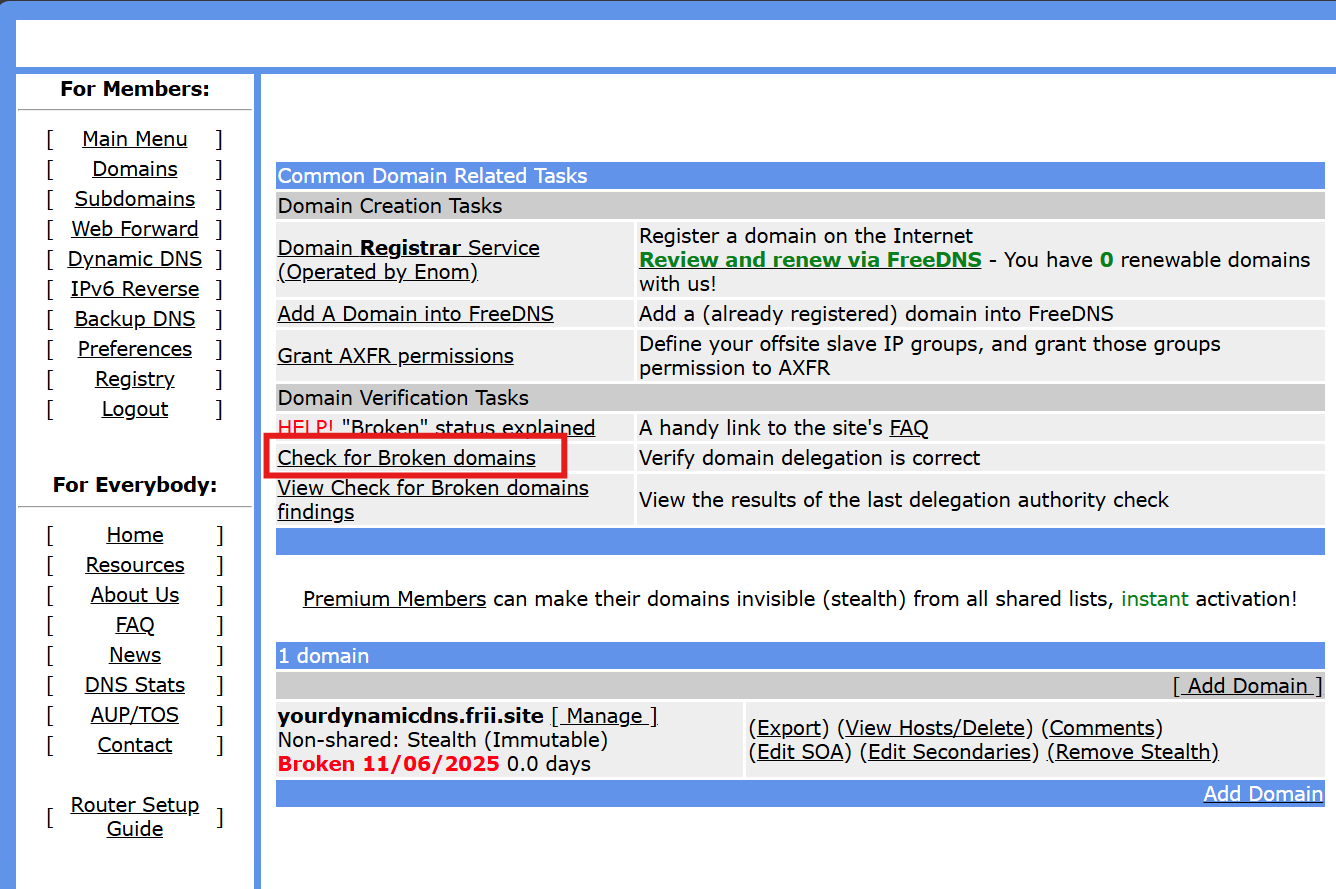
Go to the [ MainMenu ] section of the website, and click "Check for Broken domains".
NOTE
If you get an error here, please confirm that you typed out the value field correctly. If you just modified the domain, please wait a bit before trying again
4. Adding a subdomain
Once you've added a domain, you should see some pre-made subdomains on the [ Subdomains ] page.
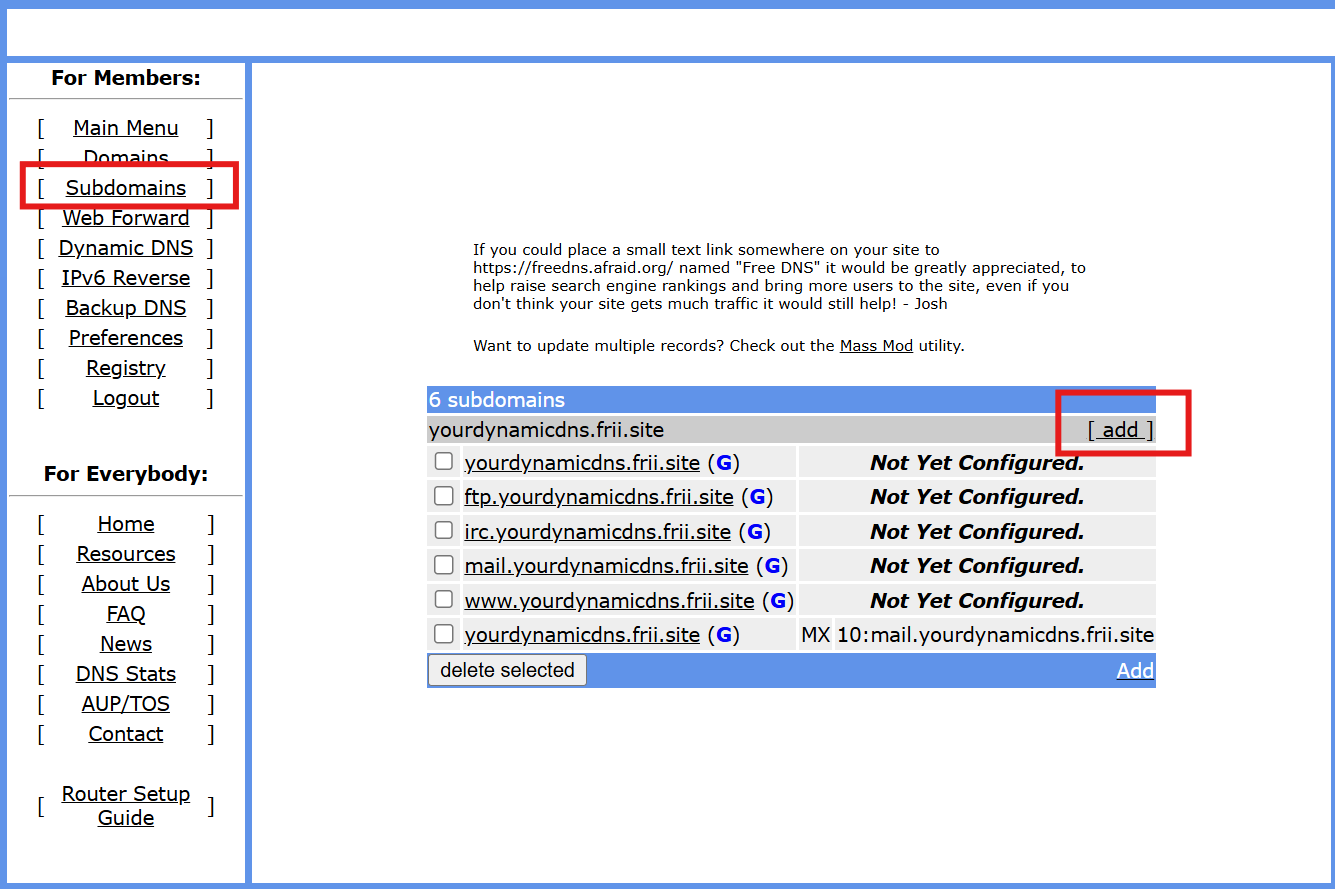
NOTE
You can't delete these just yet, we have to create a new subdomain first.
Click the add button to create a new record.
Please select your domain if it wasn't selected by default. You can leave all the other fields to their default values. 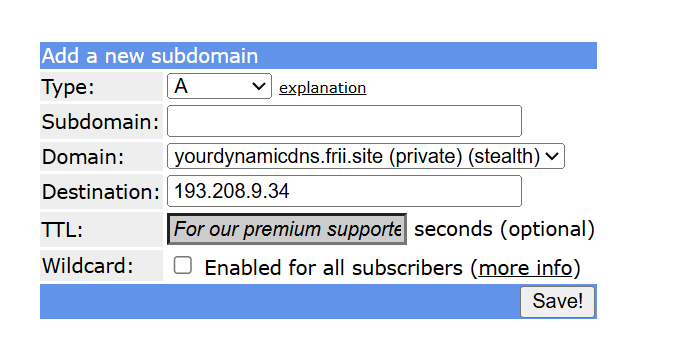
5. Confirmation
You should now see your domain listed in the subdomains 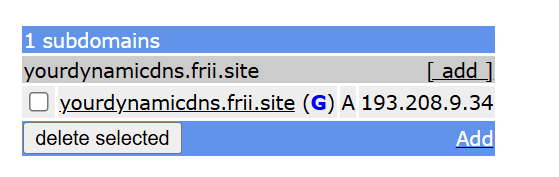
NOTE
The pre-existing records were deleted in the screenshot. However, this is not required. ´
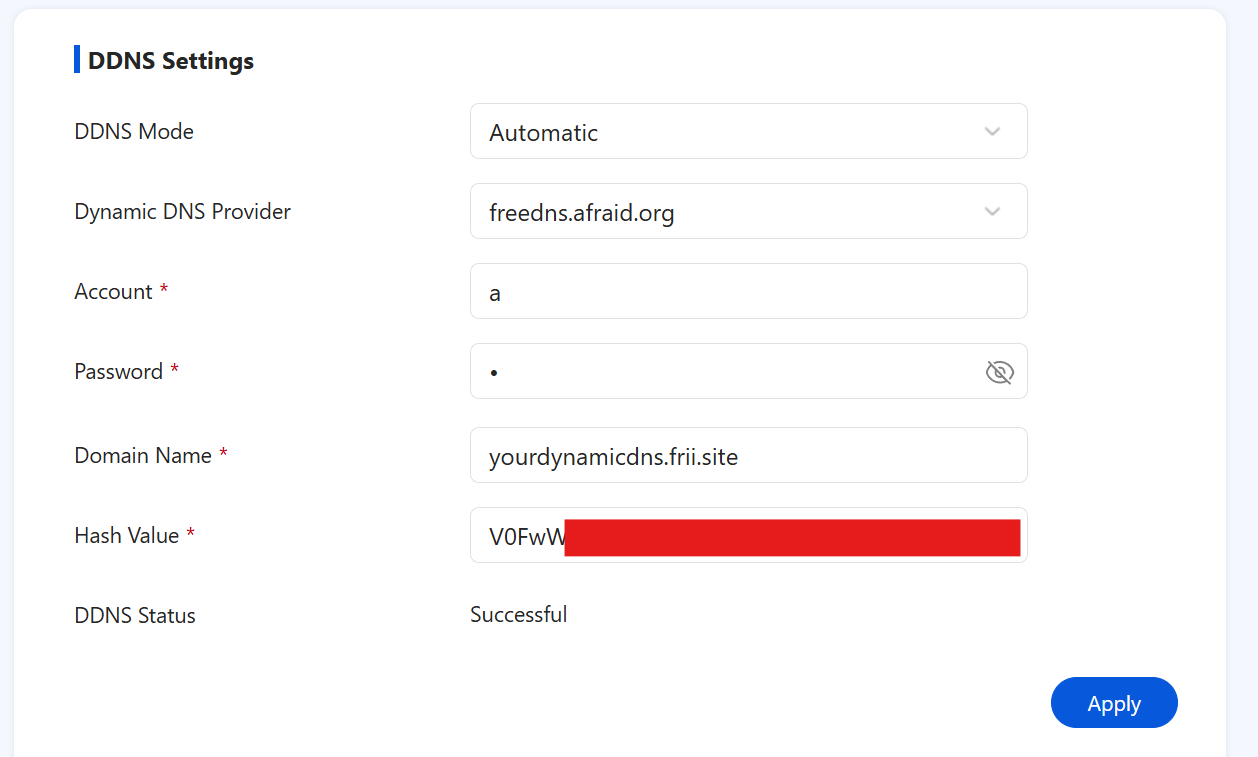
6. Setting up DDNS
Inside the [ Main Menu ], go to the DDNS section. 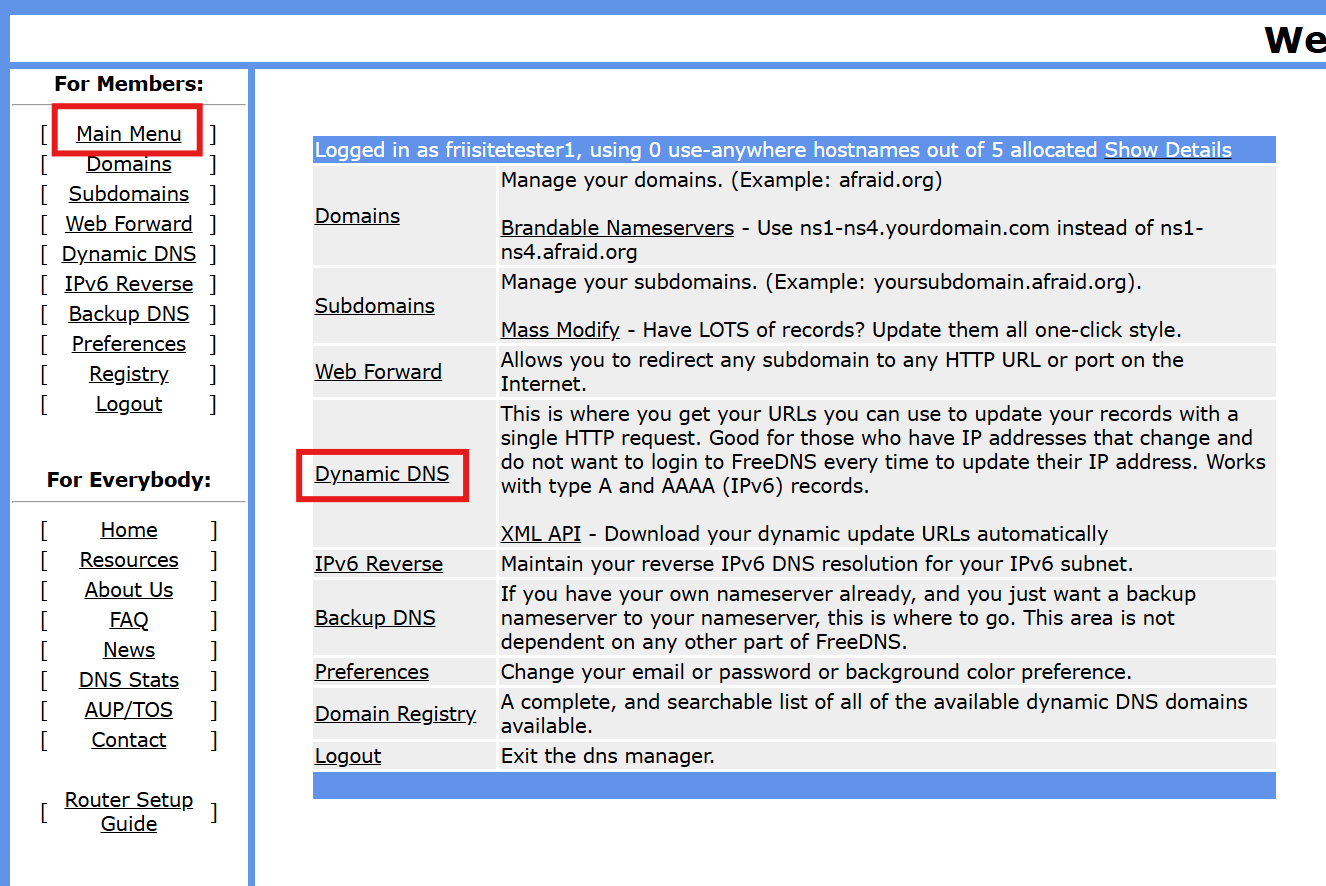
Then find your domain, and click the "Direct URL" link. 
Now copy the string after question mark 
7. Setting up the router
WARNING
Since your router is almost guaranteed to be different from the one used in this guide, we haven't included steps on how to find the DDNS settings.
WARNING
The steps below may not work for your router. This guide was made on a ZTE MC888
Once you're in your router's settings, configure your DDNS settings appropriately.
NOTE
Since we are using the domain update URL, we don't need to specify a username or password. My router forced me to, so I put "a" into both fields.